whatisthis?
javaScript. Painting App 구현 - (7) Save Image 본문
javaScript. Painting App 구현 - (6) Fill mode
javaScript. Painting App 구현 - (5) Brush Size javaScript. Painting App 구현 - (4) Change Color javaScript. Painting App 구현 - (3) 2D context controls__r.." data-og-host="mywebproject.tistory.com"..
mywebproject.tistory.com
지난 시간 진행사항
- fill mode 추가 (fillRect / fillStyle)
전체 코드 🔻
// app.js


const canvas = document.getElementById("jsCanvas");
const colors = document.getElementsByClassName("jsColors");
const range = document.getElementById("jsRange");
const mode = document.getElementById("jsMode");
const ctx = canvas.getContext("2d");

const INITIAL_COLOR = "#2c2c2c";


canvas.width = document.getElementsByClassName("canvas")[0].offsetWidth;
canvas.height = document.getElementsByClassName("canvas")[0].offsetHeight;


// Default
ctx.strokeStyle = INITIAL_COLOR;
ctx.fillStyle  = INITIAL_COLOR;
ctx.lineWidth = 2.5;

let filling = false;
let painting = false;

function stopPainting() {
    painting = false;
}

function startPainting() {
    painting = true;
}

function onMouseMove(event) {
    const x = event.offsetX;
    const y = event.offsetY;
    if(!painting) {
        ctx.beginPath();
        ctx.moveTo(x, y);
        console.log('creating path in', x, y);
    } else {
        ctx.lineTo(x, y);
        ctx.stroke();
        console.log('creating line in', x, y);
    }
}


function handleColorClick(event) {
    const color = event.target.style.backgroundColor;
    if(filling) {
        ctx.fillStyle = color;
    } else {
        ctx.strokeStyle = color;
    }

}

function handleRangeChange(event) {
    const size = event.target.value;
    ctx.lineWidth = size;
}

function fillColor(event) {
    if(filling) {
        ctx.fillRect(0, 0, canvas.width, canvas.height);
    }
}

function handleModeClick(event) {
    if(filling === true) {        // filling 모드이면
        filling = false;
        mode.innerText = "fill"
    } else {
        filling = true;
        mode.innerText = "paint"    // paint 모드이면 ㅡ 맨처음
    }
}


if (canvas) {
    canvas.addEventListener('mousemove',onMouseMove);
    canvas.addEventListener('mousedown', startPainting);
    canvas.addEventListener('mouseup', stopPainting);
    canvas.addEventListener('mouseleave', stopPainting);
    canvas.addEventListener('click', fillColor);
}


Array.from(colors).forEach(color => color.addEventListener("click", handleColorClick));


if (range) {
    range.addEventListener('input', handleRangeChange);
}


mode.addEventListener('click', handleModeClick);
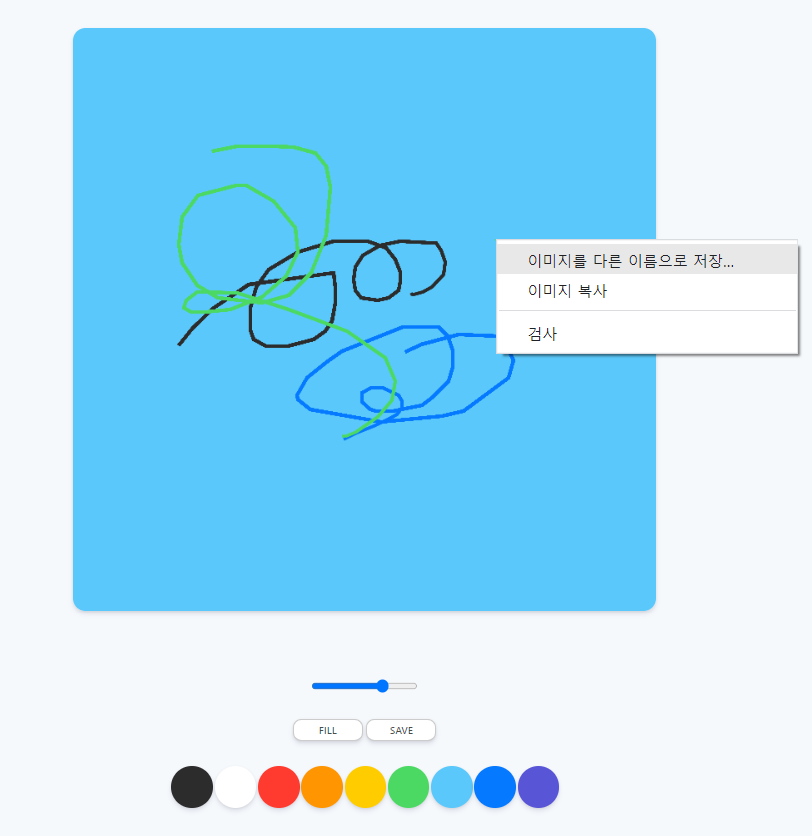
canvas에 그림을 그리고,
우클릭을 눌러보면 아래와 같이 뜬다.

이미지를 다른 이름으로 저장을 클릭하면

>>위와 같이 이름을 지정해서 저장 가능하다.
이때, 우리가 캔버스의 백그라운드를 설정 안해서
배경색이 투명으로 저장되는 버그가 있다.
따라서, 초기화 부분에 다음과 같은 코드를 추가한다.
ctx.fillStyle = "white";
ctx.fillRect(0, 0, canvas.width, canvas.height);
배경색을 흰색으로 설정하는 것.
1) fill스타일을 white로
2) fillRect로 전체를 칠해줌 (캔버스 크기 다)
만약, 우클릭시 나오는 모달창으로
저장을 못하게 하고싶다면???
| contextmenu | context menu(마우스 우클릭시 나오는 메뉴)가 나오기 전 |
canvas.addEventListener('contextmenu', handleCM)이벤트 리스너 추가 후에
function handleCM(event) {
    console.log(event)
}
함수를 만들고, event를 콘솔에 찍어보면 된다.
function handleCM(event) {
    event.preventDefault();
}
preventDefault를 통해
우클릭을 막을 수 있다.
#jsSave 버튼을 눌렀을 때, 이벤트리스너 추가
const save = document.getElementById("jsSave");if (save) {
save.addEventListener('click', handleSaveClick);
}
function handleSaveClick(event) {
	// 데이터로 저장
}
캔버스를 데이터로(이미지) 저장하려면
https://developer.mozilla.org/en-US/docs/Web/API/HTMLCanvasElement/toDataURL
HTMLCanvasElement.toDataURL() - Web APIs | MDN
The HTMLCanvasElement.toDataURL() method returns a data URI containing a representation of the image in the format specified by the type parameter.
developer.mozilla.org
HTMLCanvasElement.toDataURL() 을 이용한다.
HTMLCanvasElement.toDataURL() method
returns a data URI containing a representation of the image
in the format specified by the type parameter.
function handleSaveClick(event) {
    const image = canvas.toDataURL("image/jpeg");
    console.log(image);
}
다음과 같이 이미지를 저장한다.
>> image/jpeg는 이미지의 타입이다.
(audio태그와 video태그에서 나온것)

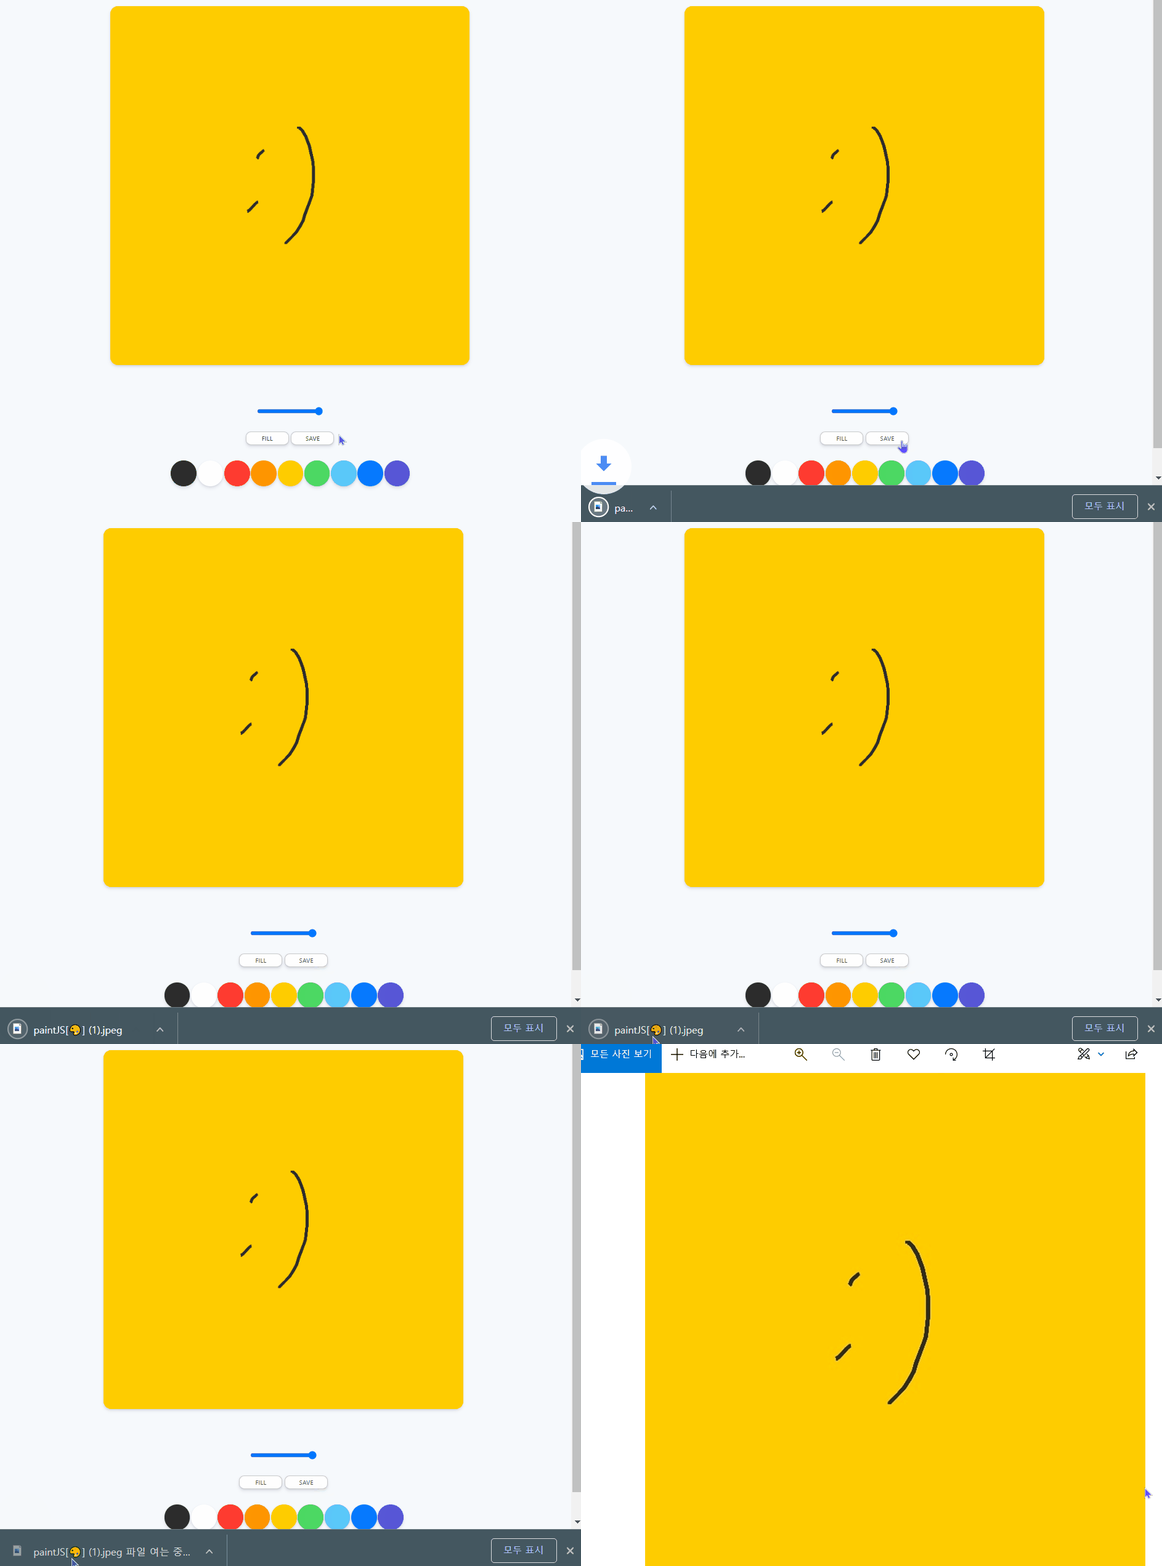
그림을 그리고 나서 save 버튼(#jsSave)를 눌러보면
콘솔에 다음과 같은 것이 찍힌다. (=image)
이걸 클릭해보면

image를 잘 보면 url, 즉 주소임을 알 수 있다.
function handleSaveClick(event) {
    const image = canvas.toDataURL("image/jpeg");
    const link = document.createElement("a");
    link.href = image;
    link.download = "paintJS[🎨]";
    link.click();
}
위와 같이
임의의 link 변수(a태그)를 새로 만들고,
그 a태그의 속성 중 href에 링크주소(=image변수)를 대입하고,
download에 저장될 이름을 지정한다.
그리고, 임의로 링크(a태그)를 클릭한다.
>> click() 메서드
** a태그의 download 속성


>>>>>>>>>
품질이 jpeg가 안좋으므로
png로 변경했다.

REFERENCE
Nomadcoder - Free Course
'PRACTICE > SELF' 카테고리의 다른 글
| html. <map>과 <area> 예제 (0) | 2022.02.04 |
|---|---|
| Painting App - (app.js) 해결중 (0) | 2022.02.03 |
| javaScript. Painting App 구현 - (6) Fill mode (0) | 2022.02.03 |
| javaScript. Painting App 구현 - (5) Brush Size (1) | 2022.02.02 |
| javaScript. Painting App 구현 - (4) Change Color (0) | 2022.02.02 |


